In the dynamic world of e-commerce, effectively adding a new product to your Shopify store involves a strategic process that goes beyond mere listing. Starting with a tour of the Shopify dashboard, this article guides users through a step-by-step approach to ensure a seamless product addition. From crafting compelling product descriptions and optimizing for SEO to incorporating multimedia elements like high-quality images and videos, each detail is crucial for enhancing product visibility and attracting potential buyers. The guide also emphasizes the significance of mobile responsiveness, efficient inventory management, and the implementation of cross-selling and upselling strategies to maximize sales potential. By the end, readers gain insights into the intricacies of creating an impactful online store on Shopify.
For those venturing into the world of e-commerce, mastering the art of adding products to a Shopify store is a fundamental step towards success. This comprehensive guide not only provides practical tips but also delves into the importance of strategic pricing, effective use of tags and filters, and the seamless configuration of payment gateways. Whether you’re a novice navigating the e-commerce landscape or a seasoned entrepreneur seeking optimization techniques, this article serves as a valuable resource, offering a blend of practical advice and strategic insights to elevate your Shopify store’s performance.
Creating an engaging and effective online store on Shopify involves more than just listing products. Adding a new product requires careful consideration of various elements to maximize its visibility, appeal to customers, and drive sales. In this guide, we’ll walk through the step-by-step process of adding a new product to your Shopify store, ensuring it stands out in the competitive world of e-commerce.
Setting Up Your Shopify Dashboard
Before diving into the product creation process, familiarize yourself with the Shopify dashboard. The intuitive interface is designed to make managing your online store a breeze. Take a moment to explore the different sections, including orders, customers, and discounts.
Adding a New Product: Step by Step
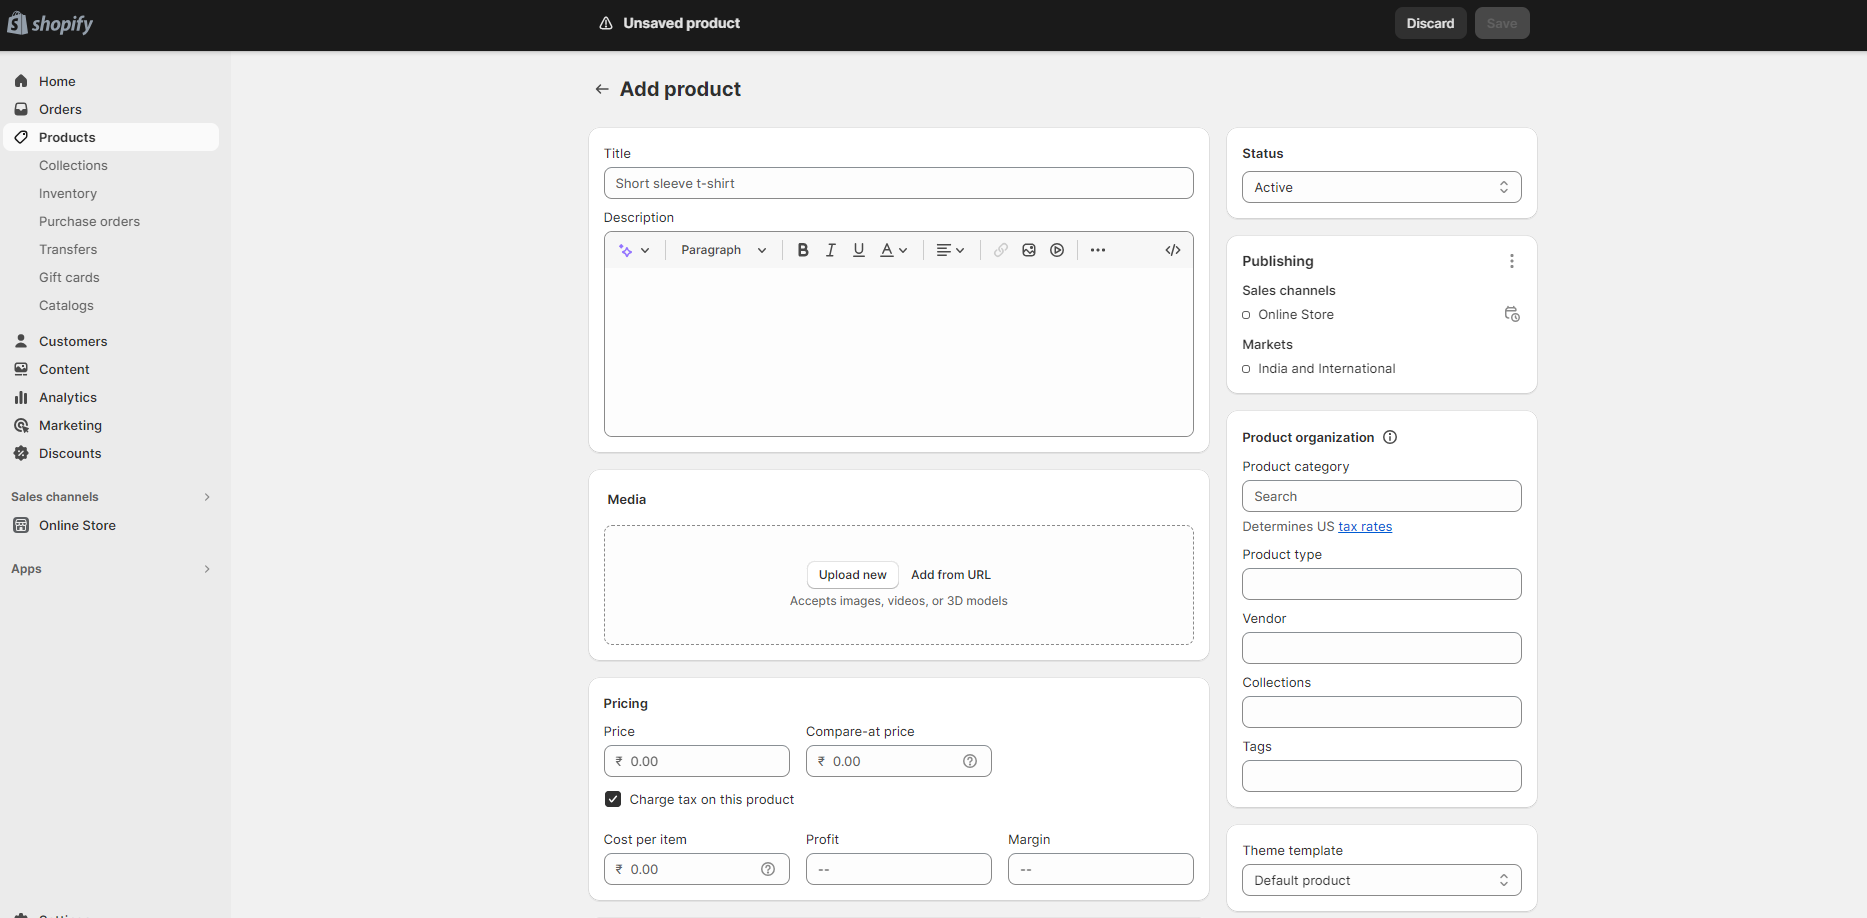
- Click on the “Products” tab in the dashboard to begin the process.
- Select “Add Product” to initiate the product creation interface.
Product Information
Now comes the crucial step of entering information about your product. Craft a compelling product title that is not only descriptive but also contains relevant keywords for SEO. Provide a detailed product description that highlights its features, benefits, and unique selling points.
Images and Multimedia
Enhance your product listing with high-quality images. Customers rely heavily on visuals, so ensure your product images showcase it from different angles. Consider embedding videos to provide a more interactive experience for potential buyers.
Pricing and Inventory
Set a competitive price for your product, considering factors such as production costs, market trends, and competitor pricing. Manage your inventory efficiently by tracking stock levels to avoid overselling.
SEO Optimization for Product Pages
Optimize your product page for search engines by strategically incorporating keywords in the title and description. Use relevant meta tags and provide alt text for images to improve discoverability.
Product Variants and Options
If your product comes in different variants (e.g., size, color), create product variants to accommodate various customer preferences. Configure options for customizable products to offer a personalized shopping experience.
Collections and Categories
Assign your product to specific collections or categories within your store. This helps organize your products and enables customers to navigate your store more effectively.
Tags and Filters
Maximize the visibility of your products by tagging them appropriately. Enable filters to allow customers to refine their search based on specific criteria, enhancing their overall shopping experience.
Cross-Selling and Upselling Strategies
Boost your sales by implementing cross-selling and upselling strategies. Showcase related products or offer complementary items during the checkout process to encourage additional purchases.
Payment and Checkout Settings
Configure secure payment gateways to facilitate smooth transactions. Streamline the checkout process by minimizing unnecessary steps, reducing the risk of cart abandonment.
Testing Your Product Page
Before making your product live, utilize preview options to see how it will appear to customers. Conduct test purchases to ensure the entire buying process is seamless and free of any glitches.
Conclusion
Adding a new product to your Shopify store is a multifaceted process that involves attention to detail and strategic thinking. By following these steps, you can create product listings that not only attract customers but also contribute to the overall success of your online store. Continuously optimize and refine your product pages to stay ahead in the competitive e-commerce landscape.
FAQs
Q: Can I edit a product listing after it’s live?
A: Yes, you can edit product details even after the product is live on your store. Simply go to the product in the dashboard and make the necessary changes.
Q: How many images can I upload for a single product?
A: Shopify allows you to upload up to 250 images for each product, providing ample opportunities to showcase your product from various angles.
Q: Can I offer different prices for different variants of the same product?
A: Yes, you can set different prices for each variant of a product, allowing you to cater to diverse customer preferences.
Q: What payment gateways does Shopify support?
A: Shopify supports a wide range of payment gateways, including popular options like PayPal, Stripe, and credit card payments.
Q: How can I track the performance of my product listings?
A: Utilize Shopify’s analytics tools to track the performance of your product listings, including views, clicks, and conversion rates.
Related Arricle : Best mobile apps for Shopify store


Leave a Reply